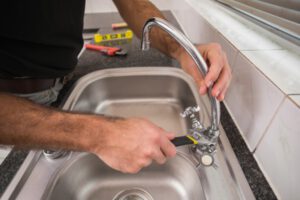
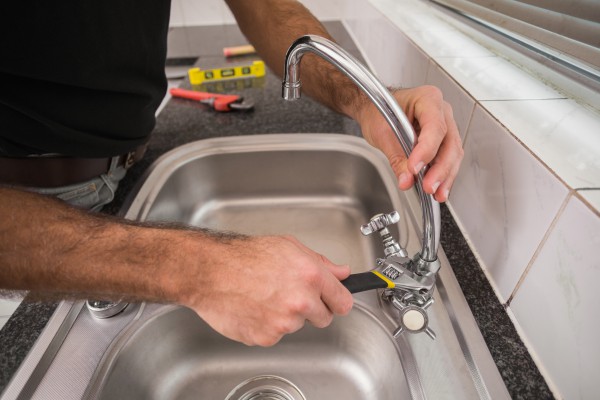
The first step in faucet repair is to turn off the water supply. Next, remove the handle using a screwdriver. This will expose the cartridge, O-rings, washers, and a valve seat or stem.

These parts can be replaced, but it may be time to replace the entire faucet assembly if the originals are damaged or worn out. Visit Website for more information.
The handle of a faucet is the part that controls how much water flows through the system. If the handle is loose or broken, it can be easily replaced with a new one. This easy DIY project can be completed in a few minutes and doesn’t require a plumber. The first step is to gather the tools you will need. Having the proper tools will ensure the success of your repair and prevent any additional damage. You can find replacement handles at any hardware store or plumbing supply specialist. It is also a good idea to purchase any other parts you will need at this time as well.
Depending on the type of faucet, the handle may have a decorative cap or screw that covers the screw holding it in place. Use a screwdriver to gently pry this off and expose the screw underneath. Often these screws are labeled with the temperature indicator, “H” or red for hot and “C” or blue for cold. Once the cap is removed, loosen the screw using a Phillips-head screwdriver or Allen wrench. After the screw is loose, remove the handle and replace it with a new one. It is a good idea to add a non-permanent thread sealant compound on the screw to prevent it from coming loose in the future.
Before beginning the handle repair, shut off the water to your sink by turning the valves beneath the sink counterclockwise. This will prevent any accidental leaks or floods while you are working on the faucet.
Next, if the faucet is cartridge-style, locate the valves under the sink and shut them off. Then, unscrew the cartridge retaining nut by hand, or with the help of a pipe wrench or tongue-and-groove pliers. Once the nut is loose, the cartridge will usually lift straight up out of the faucet body. If the cartridge is leaking, you may need to replace it or simply tighten the nut. To determine whether the cartridge needs replacing, feel it for resistance or see if there are any obvious signs of wear or damage.
Seals
Faucet seals deteriorate from normal wear and tear, but sometimes they need to be replaced. A faucet with a ceramic-disk cartridge or a ball faucet with a cam and washer may have a cracked seal that needs replacing. If the faucet is a cartridge-type, it’s a good idea to order a replacement so that you have it in stock when it’s time to reassemble the unit.
Changing the seals is relatively easy for any do-it-yourselfer, but you need to know what type of faucet you have so that you can purchase the right parts. The brand name is usually inscribed on the body of the faucet and there are repair kits available that contain the proper replacement parts.
Turn off the water supply to the faucet before you start working on it. You should also plug the sink drain so that you don’t lose any small parts while you’re working. Once the water is off, you can proceed to remove the handle and dismantle the faucet.
Before you dismantle the faucet, make sure that the packing nut is tight. Loose packing nuts can cause leaks, but they’re easy to fix if you take the time to remove the cap and loosen it with an Allen wrench or screwdriver.
Next, you need to remove the handle to access the set screw, which is usually under the handle or in a decorative cover. You may need to pry this off with a flathead screwdriver and/or remove the decorative cap. Once you’re ready to dismantle the faucet, make sure to remove the retaining clip on the cartridge-type faucet so that it doesn’t fall into your hand as you work.
Once you have the cartridge removed, you’ll need to replace the neoprene seals that are on the base of the ceramic-disk cylinder. These are easy to find and can be purchased in a kit that contains all the necessary components, but you can also buy them individually if you prefer.
The valve seat might need to be replaced, as well. It might be pitted or scratched, which is common with hard water. If it’s pitted, you need to sand it smooth and apply some plumber’s grease before you place the new seat on the stem.
Cylinder
Cylinders can do amazing things, from lifting heavy objects to powering hydraulic systems. They’re important for keeping machines running smoothly, but they can also become damaged due to a wide range of factors. When these issues occur, they require careful and precise repair techniques to ensure optimal performance. A reputable repair shop can help you maintain your cylinders by following proper maintenance practices and using specialized tools to perform repairs.
Cylinder repairs can include a variety of different processes, including disassembly, cleaning, and resealing. They can also involve precision machining and welding, if needed. Some cylinders may even need to be replaced completely. In most cases, a professional will be able to diagnose the root cause of the problem and recommend the best course of action.
Before starting a cylinder repair, it’s always wise to clean the work area to prevent contaminants from getting into the cylinder unit. It’s also a good idea to make sure that all of the necessary tools are available before beginning the repair process. Using the wrong tools can lead to metal-to-metal contact and could damage the cylinder. It’s also a good idea not to use metal tools for seal replacement, as they might nick the seal or scratch the surface of the cylinder.
While disassembling a cylinder, it’s essential to inspect all of the components thoroughly after each step. Any defects that are noticed should be fixed immediately to avoid any problems down the line. This can save you a lot of time, effort, and money in the long run.
Once the cylinder is disassembled, it’s crucial to replace the piston and gland seals. It’s also a good idea for you to replace all of the O-rings. Doing this will minimize confusion and ensure that the seals are properly installed. Once the seals and o-rings are replaced, you can install the gland assembly and end cap, then secure the piston rod. Finally, you should lubricate the seals and inside of the cylinder tube with hydraulic oil.
Cylinders are extremely complex devices that can be easily damaged by a number of different issues. Luckily, a repair shop that specializes in hydraulic cylinders can help you keep your equipment in top condition by performing routine maintenance and replacing faulty parts.
Cartridge
Cartridges are mechanical devices, and like any mechanical device they can suffer from wear and tear. One common cartridge repair technique is stylus retipping, which involves replacing the old diamond stylus with a new one. This can improve performance on a worn out cartridge, or simply restore it to its original condition. Cartridges can also be completely rebuilt, with new suspension components and coils. In addition, many technicians offer upgrades to improve a cartridge’s performance.
A cartridge is a projectile that holds and propels a chemical mixture of primer, powder, and gunpowder. There are several types of cartridges, including centerfire and rimfire. A rimfire cartridge has its primer in a small nipple-like projection on the edge of the case base, whereas a centerfire cartridge’s primer is located in the case head.
In the past, there were also pistol cartridges with primers located in the case walls (cupfire), the case head (teat fire), or in a sideways projection on the base of the case head (pinfire). Today, only center and rimfire cartridges remain in mainstream usage.
As your retro video game cartridges get older they may begin to lose their ability to work, either they start showing garbled graphics on the screen or don’t boot at all. This is usually caused by the contact traces on the cartridge getting dirty and blocking the pins that connect to the cartridge slot in the console unit. A good cartridge cleaner is the best way to clean these contacts and prevent them from getting dirty again.
If you want to repair a cartridge yourself, you can find plenty of online tutorials and guides. However, it’s important to know that you should only try this if you’re an expert at cartridge repairs and have access to the right tools. Otherwise, you could damage your cartridge further, which might require professional intervention anyway.
A professional cartridge repair service can fix your cartridge and return it to you in excellent working condition. They have extensive experience with a wide variety of brands and can even upgrade your cartridge to mono use or switch its stylus. They can also repair the back damper, which is crucial to maintaining high compliance.


